Sunday, February 28, 2010

FTMM LAYOUT


FTMM WEBSITE LAYOUT

Designing Website Layout
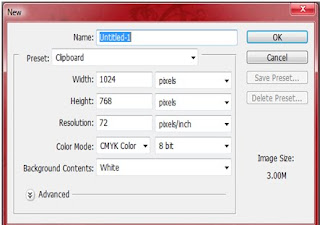


1. Create a new document in Photoshop and set width and
height to 1024 pixels x 768 pixels with white background.


2. For the banner column, draw a rectangle with size
1024 pixels x 125 pixels by using Rounded Rectangle Tool.


3. For icon column, draw a rectangle with size 55 pixels x 40 pixels
by using Rounded Rectangle Tool.


4. Repeat step 5 for another 8 icons.


5. For calendar column, click on Add Layer icon in the Layers panel.
By using Rounded Rectangle Tool, make the column with size
200 pixels x 200 pixels.


6. For contact us column, same as Step 7 but the column size is
200 pixels x 125 pixels.


7. For content area column, using rectangular tool and the column size is
600 pixels x 520 pixels.


8. For picture column, same as Step 7 but the column size is
170 pixels x 215 pixels.


9. For visitor column, same as Step 7 but the column size is
170 pixels x 69 pixels.

Friday, February 26, 2010

FTMM MENU BAR


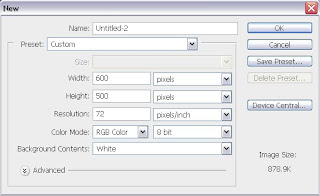
1.Choose file>new from menu bar and the dialog box will display.

2.Set the width with 600 pixels and the height 500 pixels.

3.click OK.


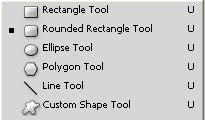
4.Click on rounded rectangle tool.

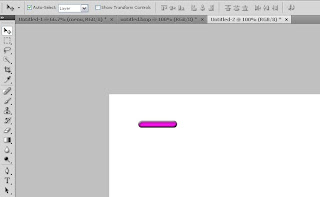
5.Draw the shape on the clipboard.

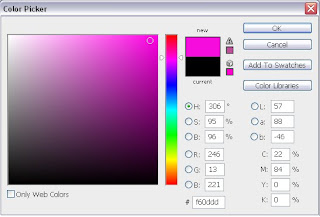
6.Choose the colour as needed and the rectangle with colour is appeared.

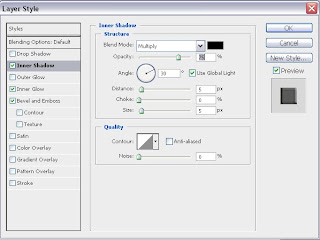
7.Then click layer style> inner shadow.

8.After that, tick on inner glow and bevel emboss on the dialog box.

9.Click OK.


10.Next step,click on the horizontal type tool and choose the font type as showcard gothic and the font size 14 pt.

11.Write menu,about us,contact us,programme,facilities,and department inside the box.


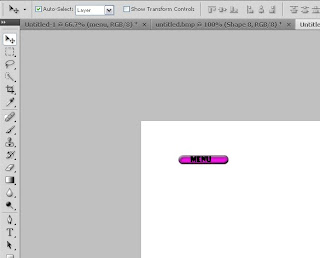
Figure 1

12.Finally the result will be appeared as figure 1.

FTMM BANNER


1. This is the banner that we create for this Introduction to Multimedia project.

2. We design the banner by using the software “Adobe Photoshop”.


3. Basically we choose background colour such as yellow, orange and green colour. It is a cheerful colour to resemble that multimedia is a creative and interactive medium. The entire background colour is also harmony.


4. The dictum or the words that we use title “Faculty of Information Technology and Multimedia”. The typeface for this word is Walt Disney.

5. Meanwhile the word for Introduction to Multimedia, we use Banana Split as the typeface.

6. All the three pictures that we put in the banner are taken from the internet.

7. We crop all the pictures from its original picture. We don’t use the original and the whole picture. We use the crop tool from the tool bar option.


8. The first picture is “Dataran Siswazah”. We choose the picture because it represents the place for the students to have agglomerate to change their opinion about studies and etc. We crop the picture into our desire part of the picture.


9. The second picture that we choose is University Tun Hussein Onn Malaysia (UTHM) building. We choose this picture because it reflects the university that we studies. We also crop the picture using crop tool in the Adobe Photoshop tool option bar.


10.The third picture is Faculty of Information Technology and Multimedia (FTMM) building. We choose this picture because it is the symbol for our faculty. We crop only the FTMM building from the entire picture that we taken from the internet.

11. Lastly, we add the logo that we have designed before.

12.To put the logo to the banner, we click file on the menu bar. Then, we click open and choose from where we have saved the file.

13. Next, we copy and paste the picture to the banner and resize the size using transform tool.

14. Finally, the banner is been used.

FTMM LOGO

1. The software need to create the logo is Adobe Photoshop.By using Adobe

2. The new background layer is created by setting the width to 450 pixels, height to 350 pixels and the resolution is 90 pixels/inch.

3. Then, open the images downloaded from the internet.

4. The blue circle is adjusted first to resize the image using free transform.


5. Put another shape into the blue circle by adjusting the shape so that it is compatible with the circle.

6. Put another graduation cap, hawks,mouse and the pencil into the shape.Before that, all the size was adjusted using free tranform tool

7. The colour in the blue circle is changed from white to the grey colour using paint bucket tool.

8. Start to write the text on the circle using text tool.the words “UTHM” is written on the bottom of the circle.The words “with wisdom, we explore” is written on the top of the circle.

9. The size of words used are 15.

10. Write the words”FTMM” into the shape. The text size of the words are 13.5 .

11.The whole image include the circle,shape and the items are adjusted to become more attractive using several effects.

12.The effect s that to be used are drop shadow,bevel and emboss,outer grow,inner grow and colour overlay.

13.All the effects can be found by pressing the blending option mode on the layer pallete .

14.The opacity of the mouse is set to 70% by using bleding option mode to adjust it.

15.The logo finally is created and saved to be uploaded into the web.


We put the words” with wisdom we explore” which is the motto of UTHM into the blue circle using text..The words “UTHM” were put in the bottom on the circle to represent the name our university. The Hawks was selected as one of the item on our logo was due to its courage, bravery to explore and manage to survive In the world using its wisdom. The graduation cap was selected to represent the graduates of the UTHM managed to contribute to our country and the quality of students were simply the best. The pencil was selected to represent the persistent and hardworking of the UTHM students in order to success and could be able to compete with other graduates all over the world. By doing this project, the people will exactly know the information technology student are important and manage to contribute of development of the country.