Wednesday, April 7, 2010

LOCKER


Library

  • Open a new work with width 100 and height 100 pixels.
  • Open the photo you have chosen. Go to file>open.
  • On the toolbox select the rectangle marquee tool. Place it around the entire picture.
  • Copy the image and click on the blank canvas and paste the image.
  • Use the blending option to edit the image.
  • Use the paint bucket for the background color of the image.
  • Finally use the horizontal type tool to type word "library" with the font and size you like.
  • Done.


Locker


  • Open a new work with width 100 and height 100 pixles.
  • Open the photo you have chosen. Go to file>open.
  • On the toolbox select the rectangle marquee tool. Place it around the entire picture.
  • Copy the image and click on the blank canvas and paste the image.
  • Use the blending option to edit the image.
  • Use the paint bucket fot the background color of the image.
  • Finally use the horizontal type tool to type word "Locker" with the font and size you like.
  • Done.

Student Email

Start by create pen tool

Pick a solid color as shown:

Apply the layer style:

Finally the icon is done to be created:

Staff Email

Start by create pen tool

Pick a solid color as shown:

Create the gradient overlay:

Finally the icon is done to be created:


Sunday, April 4, 2010


LOGO ICON


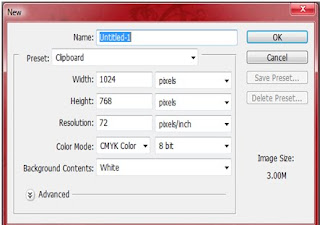
Open a new document in Photoshop >File>New

Set as 128x128 pixel.It is shown above
Choose the ellipse tool and make a circle shape.
Next step, put the FTMM logo inside the round shape

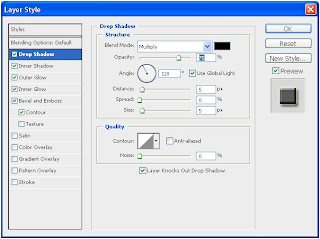
Finally, on the layer style box, tick on drop shadow,outer glow, and stroke to give side effects for your icon.


CALENDAR ICON

Make a new document in Photoshop. I’ve made mine 100×100 pixels.Making sure you’re working on a blank layer, grab the Rectangular Marquee Tool. Holding down Shift, drag out a square.

Fill the square with any colour. We will be adjusting this layer with Blending Options.

Select Blending Options for this layer.

Select Inner Shadow. Set the blend mode to Normal.


Select Gradient Overlay. Create a subtle light gray – near white gradient. Set the angle to 127 degrees.

Select Stroke. Set the size to 1 px, and the colour to a dark red.

Select OK. This is what your calendar should look like so far:

Make a new layer. Ctrl-click the first layer (to select it).

Using the Rectangular Marquee Tool, hold down alt while dragging a rectangle over the bottom portion of the calendar.

This will leave you with just the top part of the canvas selected. Once again, fill this layer with any colour. We’ll adjust it in Blending Options.

Go to Blending Options. Select Inner Shadow. Change the Blend Mode to Normal, and select a light red/pink.


Select Gradient Overlay. Create a subtle dark – light red gradient. (If you’re dealing with lighter colours, you may also want to apply a 1 px stroke).


This is how your icon should look so far:

Now head on over to the next page to learn how to add a shine to your calendar.

Saturday, April 3, 2010

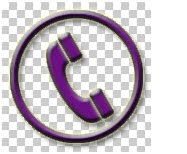
telephone icon

1. Start by creating this shape with pen tool :-

1. 2. Apply this drop shadow

1. 3. Apply this inner shadow

1. 4. Apply this outer glow

1. 5. Apply this inner glow

1. 6. Apply this bevel and emboss

7. Apply this contour

1. 8. Draw this with pen tool :-

9. Apply this layer

1. 10. Draw this with pen tool :-

1. 11. Duplicate the shape


home icon

1. 1. Draw this with pen tool :-

2. Apply these layer style :-


3. Apply this satin layer

1

4. 4. Create this roof shape using pen tool :-

1. 6. 5. Add this shape and put it on top of the roof


Sunday, February 28, 2010

FTMM LAYOUT


FTMM WEBSITE LAYOUT

Designing Website Layout


1. Create a new document in Photoshop and set width and
height to 1024 pixels x 768 pixels with white background.


2. For the banner column, draw a rectangle with size
1024 pixels x 125 pixels by using Rounded Rectangle Tool.


3. For icon column, draw a rectangle with size 55 pixels x 40 pixels
by using Rounded Rectangle Tool.


4. Repeat step 5 for another 8 icons.


5. For calendar column, click on Add Layer icon in the Layers panel.
By using Rounded Rectangle Tool, make the column with size
200 pixels x 200 pixels.


6. For contact us column, same as Step 7 but the column size is
200 pixels x 125 pixels.


7. For content area column, using rectangular tool and the column size is
600 pixels x 520 pixels.


8. For picture column, same as Step 7 but the column size is
170 pixels x 215 pixels.


9. For visitor column, same as Step 7 but the column size is
170 pixels x 69 pixels.